How to Hide a Blog Post from a Blog Page on Webflow: A Step-by-Step Guide
- WebOps Platforms Bug Tracking & Feedback Software Web Development & Design


Webflow is a powerful tool for creating and managing websites, offering flexibility in design and content management. However, there are times when you may want to hide a specific blog post from appearing on your blog page without deleting it from your CMS. Whether you’re archiving older content, managing seasonal posts, or working on drafts, knowing how to control the visibility of your blog posts can be incredibly useful.
In this guide, we’ll walk you through the various methods to hide a blog post from your blog page on Webflow, ensuring your content is managed effectively and your site remains optimized for SEO.
Why You Might Want to Hide a Blog Post
Before we dive into the steps, let’s quickly discuss why you might want to hide a blog post:
- Content Updates: You’re working on updating the content but don’t want it live yet.
- Seasonal Content: Some posts might only be relevant during certain times of the year.
- Archiving: You want to keep the content in your CMS but not display it on the blog page.
- SEO Management: Hiding low-performing content to focus on better-optimized posts.
Method 1: Change the Post’s Status to Draft
The simplest way to hide a blog post from your blog page is to change its status to Draft. This method is quick and effective, especially if you’re not ready to publish the post or want to temporarily remove it from the live site.
Steps:
- Open Webflow and Access CMS:
- Go to your Webflow project and click on the CMS Collections panel.
- Select the Blog Post:
- Find and click on the blog post you want to hide.
- Change the Status:
- In the editor, change the status from Published to Draft.
- Save Changes:
- Ensure your changes are saved, and the post will no longer appear on the live blog page.
This method is perfect if you want to work on the post later or if the post is not yet ready for publication.
Method 2: Use a Filter to Exclude the Post
If you need to keep the blog post published but simply want to hide it from the blog page, using filters is a great solution.
Steps:
- Navigate to the Blog Page:
- Go to the page where your blog posts are displayed.
- Select the Blog Posts Collection List:
- Click on the collection list element that displays your blog posts.
- Add a Filter:
- In the settings panel, find the Filter option.
- Add a filter to exclude the specific post by its slug or another identifying field.
- Example: Set the filter to exclude where Slug is not equal to your-post-slug.
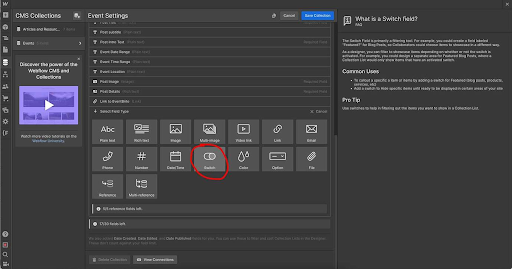
- Example: Add a “suppress” switch for the posts. Turn the switch on for all posts that you don’t want to display.


- Publish Your Site:
- Save your changes and publish your site to apply the filter.
This method is ideal for hiding specific posts from the blog page while keeping them accessible elsewhere on your site.
Method 3: Use Custom Code for Dynamic Hiding
For more advanced users, adding custom code to your Webflow site allows you to dynamically hide blog posts based on specific conditions.
Steps:
- Access the Custom Code Section:
- Go to your project settings and navigate to the Custom Code tab.
- Insert JavaScript:
- Add custom JavaScript to hide the blog post by its unique ID or class.
javascript
<script>
document.addEventListener(“DOMContentLoaded”, function() {
var postToHide = document.querySelector(‘.blog-post[data-slug=”your-post-slug”]’);
if (postToHide) {
postToHide.style.display = ‘none’;
}
});
</script>
(Replace your-post-slug with the actual slug of the post you want to hide.)
- Publish Your Site:
- Save your changes and publish the site.
This method provides greater control, allowing you to hide posts based on dynamic conditions or user interactions.
Conclusion
Managing the visibility of your blog posts on Webflow is crucial for maintaining a clean and user-friendly website. Whether you’re updating content, archiving old posts, or optimizing for SEO, these methods give you the flexibility to control what appears on your blog page.
By using these techniques, you can ensure that your Webflow site remains well-organized and that your content strategy aligns with your overall business goals.


