How to Cancel iScanner (2026)
How to cancel iScanner
Here’s a quick guide on how to cancel your iScanner subscription. Whether you’re switching to another app or simply reducing your expenses, this guide will walk you through the cancellation steps with ease. iScanner offers a range of scanning tools, but if you’re exploring alternatives, consider checking out other tools in the Worksuite category that might better meet your needs. Follow this guide for a smooth cancellation process.
How to Cancel an iScanner Subscription
Canceling your iScanner subscription is straightforward when you follow the right steps. Whether you’re looking to end a trial or an active subscription, this guide will help ensure a hassle-free process.
How to Cancel iScanner: Step-by-step
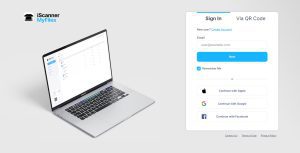
Step 1: Log into Your iScanner Account
To begin, log in to your iScanner account on the iScanner website. Click on the Sign In or Log In button, and enter your credentials to access your account dashboard.
Step 2: Access Your Subscription Settings
Once logged in, navigate to the Account Settings or Subscription Management section. This can usually be found in your User Dashboard or under your Profile Settings. Look for a tab or link specifically labeled Subscriptions.
Step 3: Locate the Cancel Subscription Option
Within the subscription management section, find an option labeled Cancel Subscription or Manage Subscription. Click on this option to proceed with the cancellation process.
Step 4: Follow the Cancellation Process
iScanner may prompt you to provide a reason for canceling or offer alternative options. Follow the on-screen instructions and be sure to review any terms or conditions associated with the cancellation to avoid unexpected charges.
Step 5: Confirm the Cancellation
Before finalizing the cancellation, you may be asked to confirm your decision. Double-check your cancellation details, and if everything looks correct, confirm the cancellation. You should receive a confirmation email shortly afterward.
Additional Tips:
- Save a Copy of the Confirmation: Keep a record of your cancellation confirmation for your reference.
- Verify Your Billing Cycle: Make sure you review your billing period to avoid being charged for the next subscription cycle.
Conclusion
Canceling your iScanner subscription is a straightforward process when you follow the correct steps. By reviewing your subscription, initiating the cancellation, and confirming it, you can ensure a smooth transition. If you encounter any issues or have questions, visit the iScanner Support page for assistance.
For more detailed instructions or specific questions about your iScanner account, feel free to visit their FAQ page or contact the iScanner support team directly.

For deals on other subscription services, visit Subscribed Deals to explore offers that can help you save.
Looking for Alternatives?
If you’re exploring other tools after canceling your iScanner subscription, here are some great alternatives for productivity, document management, and creative work:
- Canva: A user-friendly design tool for creating stunning graphics, presentations, and documents.
- Tactiq.io: A tool for transcribing and capturing meeting notes in real-time, making your virtual meetings more productive and organized.
- Google Workspace: A comprehensive suite of tools including Google Docs, Sheets, and Drive for seamless document creation and collaboration.
- Notion: An all-in-one workspace for note-taking, task management, and project collaboration, ideal for organizing your personal and professional life.
- Stake: A platform that enables you to invest in global stocks and build a diversified portfolio with ease.
These alternatives provide a range of tools to support your document management, design, and productivity needs.